VoIP services in Odoo with DIDWW
DIDWW is a global VoIP and SIP trunking provider. An active account with DIDWW is required to use this service.
Before creating an account with DIDWW, make sure that the company's location and the applicable regions are supported by DIDWW's services.
DIDWW setup
After verifying country coverage and availability, create an account with DIDWW. Then navigate to the DIDWW Dashboard.
既存の電話ネットワークサービスプロバイダから既存の番号を移管するには、`DIDWWウェブサイト <https://doc.didww.com/phone-numbers/number-porting/index.html>`_に記載されている手順に従ってください。
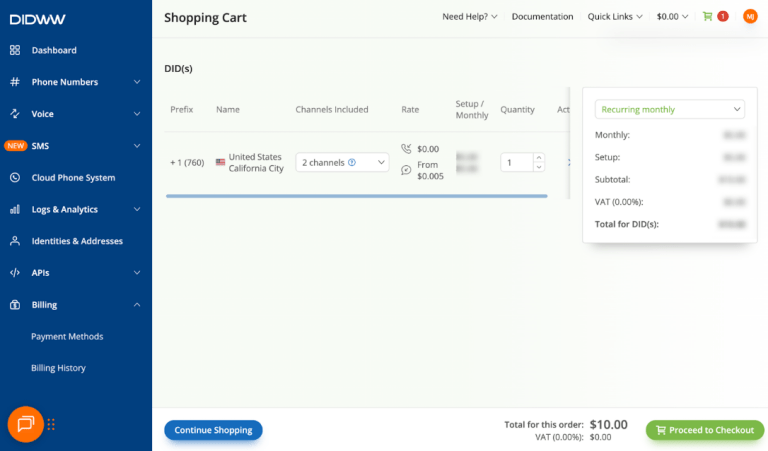
新しい番号を購入する
新しい電話番号を購入するには、ダッシュボードでBuy Numbersをクリックし、指示に従って購入を完了します。
新しい番号を購入する場合、着信通話とLocal CLIの両方をサポートしている**必要があります**。
phone.systemsを有効化する
次に、ダッシュボードのサイドバーでCloud Phone Systemをクリックします。次にLaunch admin UIをクリックします。
重要
*phone.systems PBX*機能はDIDWWの追加有料サービスであり、追加料金が発生する場合があります。
新しいユーザを作成するには、Usersをクリックし、プラス記号をクリックして必要な情報を入力します。

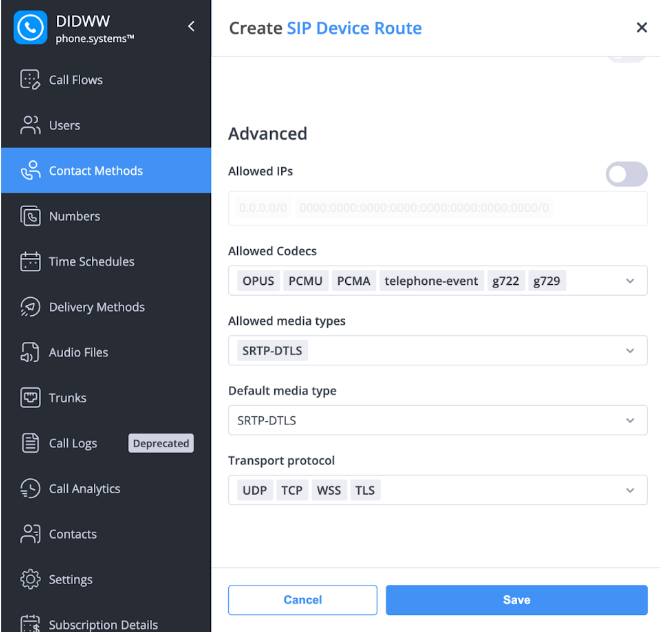
Contact Methodsをクリックし、プラス記号をクリックして新しい*SIP Device Route*を追加します。
次のパラメータを設定または追加します:
Allowed Codecs:
OPUS、PCMU、PCMA、telephone-event、g722、g729。Allowed media types:
SRTP-DTLSDefault media type:
SRTP-DTLSTransport protocol:
UDP、TCP、WSS、TLS
ちなみに
*Inbound and Outbound DID/Caller ID*選択のドロップダウンから利用可能な電話番号がない場合は、Inbound voice trunkを変更する必要があります。ダッシュボードに移動し、My Numbersをクリックします。Configurationまでスクロールします。Inbound voice trunkフィールドで、phone.systemsを選択します。
Odooセットアップ
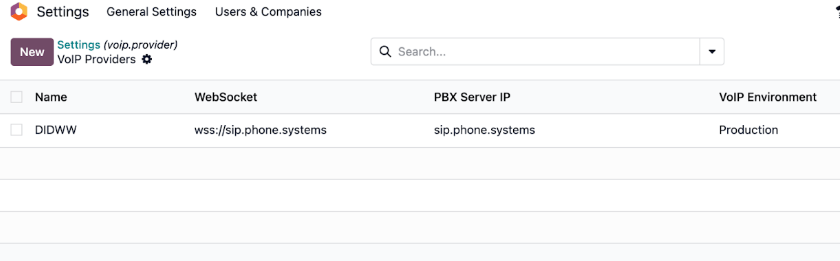
In Odoo, navigate to . Click New.
Enter the name, DIDWW, then update the WebSocket field with wss://sip.phone.systems.
Under PBX Server IP, enter sip.phone.systems.
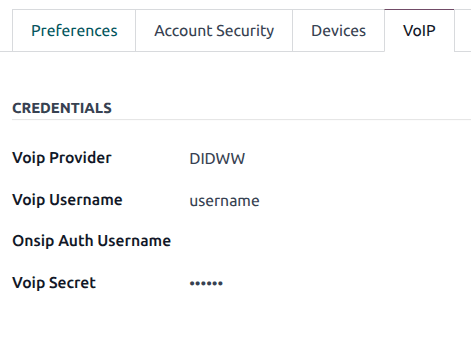
To configure a user's VoIP provider, click the user avatar icon in the top-right corner of the database, and then choose My Preferences from the sub-menu. Then click into the VoIP tab, and under the Voip Provider field, select DIDWW. Finally, enter the Voip Username and Voip Secret, then save.