発送管理システム
Odooの*発送管理システム* 機能は、配送の計画と構築に使用されます。主な機能は次のとおりです:
設定
発送管理システムを使用するには、以下の設定を完了する必要があります:
フリート アプリを インストール します。
在庫 アプリで、必要機能 を有効にします。
Enable and configure the Mapbox integration.
車両 :ref:積載量 (容積および重量) <inventory/shipping_receiving/vehicle-capacity>` を設定します。
Enter vehicle car models.
車両を配送方法 として設定します。
ドックロケーション を作成します。
重要
Dispatch management can evaluate capacity on a vehicle only if a weight and volume are assigned to a product on the Inventory tab of its product form.
在庫設定
To set the required inventory settings, navigate to .
In the Operations section, select the Batch, Wave & Cluster Transfers checkbox to prepare batches of orders for delivery.
In the Shipping section, select the Delivery Methods and Dispatch Management System checkboxes. Doing so allows specific vehicles to be set as carriers.
In the Warehouse section, select the Storage Locations checkbox to assign specific locations in the warehouse as loading zones for delivery trucks.
そして、全ての設定が完了したら、必ず 保存 をクリックして下さい。
Mapbox integration
Next, configure the Mapbox integration.
First, create a Mapbox account. If you already have a MapBox account, log in. Upon login, the Account overview page displays.
Then, create an access token.
After the token is created, copy it to the clipboard.
重要
If you have created a secret token, Mapbox does not display secret tokens again after leaving the Access tokens page. Make a copy of this token now.
In Odoo, navigate to the app. In the Integrations section, locate the Map Routes setting. Paste the token in the Token field.
Be sure to click Save to save the settings.
車両積載量
車両積載量を設定するには に行きます。
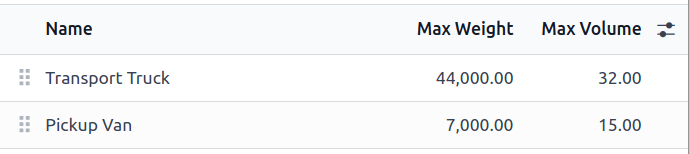
次に、新しいカテゴリを追加するには 新規 をクリックし、既存のカテゴリを修正するにはそのカテゴリをクリックします。 名前 フィールドに車両の種類 (例:ピックアップトラック、バン、または`貨物トラック` など) を入力します。次に、最大重量 (キログラム単位)および 最大容積 (立方メートル単位)のフィールドに車両の積載量を入力します。
注釈
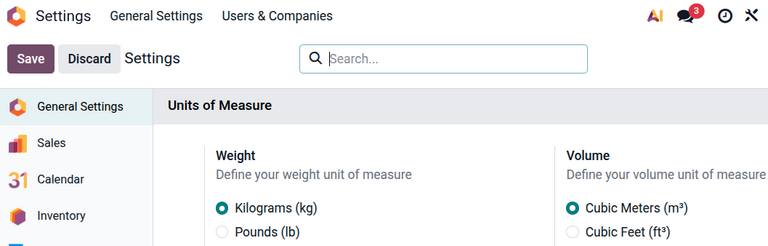
車両容量の測定単位は、設定 アプリの 測定単位 セクションで全体レベルで割当てられます。
参照
車両モデル
Odooで車両を追加する際には、車両の車種を設定する必要があります。 車種には正しいカテゴリが選択されていることを確認して下さい。 そうすることで、そのタイプの車両全てに重量と容量が自動的に適用されます。
設定するには、 に移動して下さい。
モデル リストから既存のモデルを選択するか、左上隅にある 新規 をクリックして新しいモデルを作成します。次に、関連する カテゴリ フィールドを該当する車両カテゴリに設定します。
参照
配送方法
Optionally, delivery vehicles can be assigned as a delivery method carrier.
配送方法を設定するには、 をクリックします。
参照
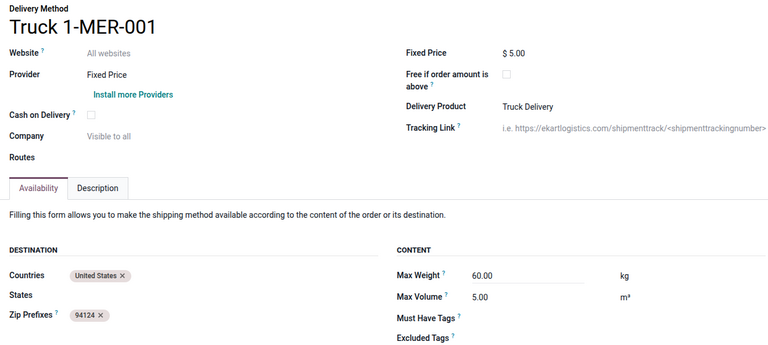
配送方法 フォームに、配送方法の名称を入力します。車両の説明やナンバープレート番号など、識別可能な情報を使用することをお勧めします(例: トラック 123-ABCD)。
配送方法は内部で管理されているため、プロバイダー を 固定価格 または 計算規則に基づく のいずれかに設定します。配送価格の計算方法の詳細については、配送方法 の記事を参照して下さい。
次に、配送プロダクト を設定します。これは、顧客の 配送料 として販売オーダまたは顧客請求書に表示されるプロダクトです。
オプションとして、利用可能 タブで、国、州/都道府県、または 郵便番号プレフィクス を設定して、ローカル配送の範囲を限定することができます。
ドックロケーション
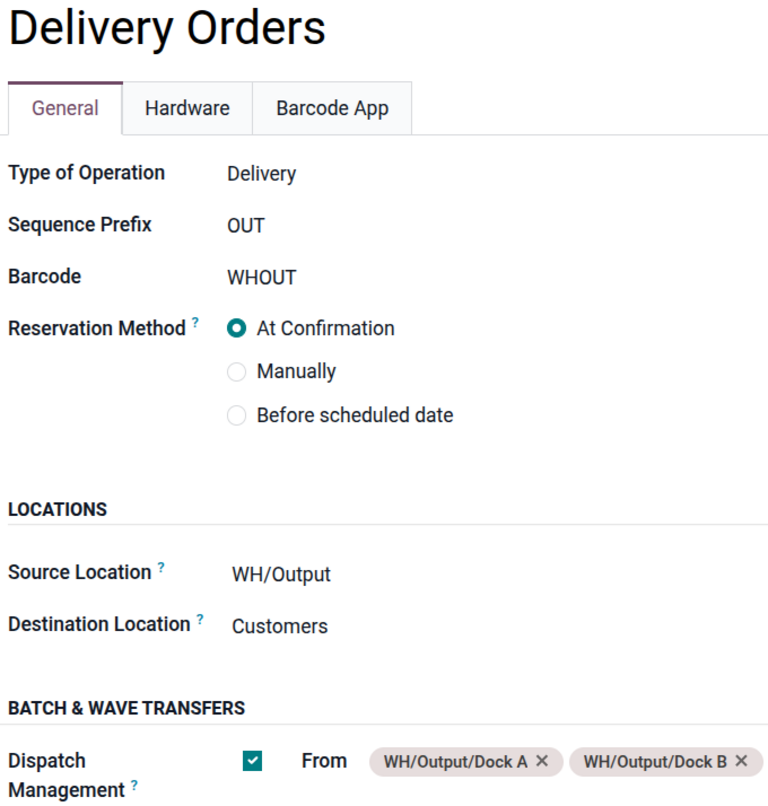
Each loading dock must have a dedicated location. To create dock locations, go to and click New.
After dock locations are set up in Odoo, configure them in the operation type. Navigate to and open an existing delivery operation type, or click New to create a new one.
After defining the other fields in the operation type form, scroll to the Batch & wave transfers section and select the Dispatch Management checkbox. The Dock locations field appears. Define the dock locations for this operation type.
載積を構築する
After setup is complete, optionally assign orders to a carrier and group them into batches. Then, configure the batch form, as needed.
プロダクトをグループ化するには、 に移動し、発送済みの配送のリストを表示します。
参照
Because this article is about a specific use case, explore details about each picking method in their dedicated articles.
配送業者の割当
Reveal the Carrier column, if it is not visible by default, by clicking the (settings) icon in the top-right corner, and selecting the Carrier checkbox.
ちなみに
有効にできるその他の便利な列は、郵便番号、配送重量、配送容量 です。
Select the delivery orders for the batch by selecting the checkboxes on the left. Next, click into the line's Carrier fields. In the resulting drop-down menu, choose the desired vehicle's delivery method. A Confirmation pop-up window appears, indicating the number of orders being added to the batch. Click Confirm, and the carrier is updated for all the selected records.
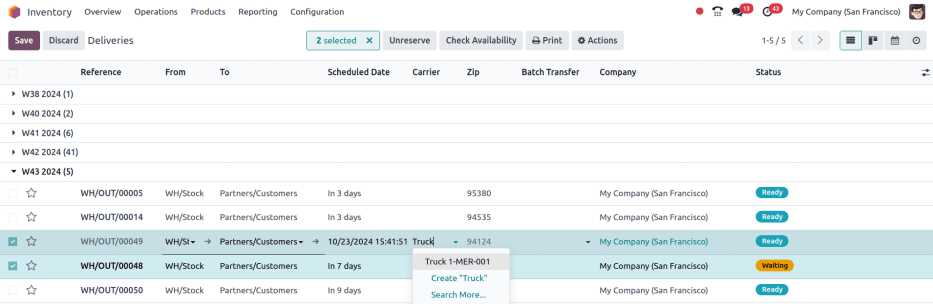
出荷オーダ2件に対して、配送方法 トラック 1-MER-001`が :guilabel:`配送業者 として設定されています。
一括転送を作成
配送業者を設定したら、チェックボックスにチェックを入れ一括転送またはウェーブ転送にオーダを追加します。
注釈
出荷オーダがすでに一括転送に割当てられている場合、ここで一括転送を割当てても、更新はされません。
次に、 アクション ボタンをクリックし、バッチに追加 または ウェーブに追加 のいずれかをクリックします。ポップアップウィンドウで、追加先 が 新規 [一括/ウェーブ] 転送 に設定されていることを確認し、確認 をクリックします。
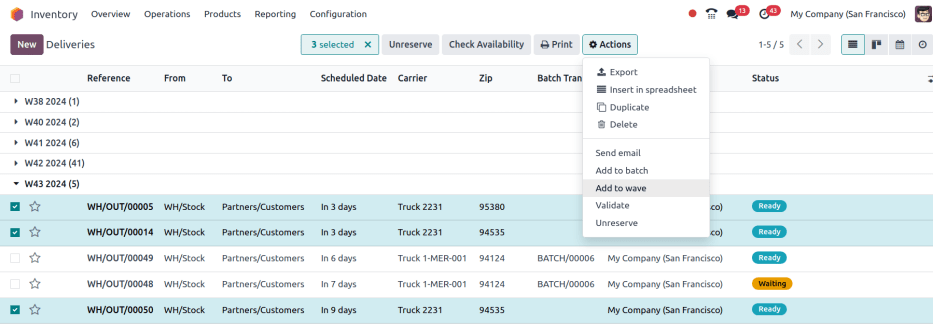
出荷オーダは、ウェーブ転送にグループ化されるように選択されます。
代替のバッチ作成方法
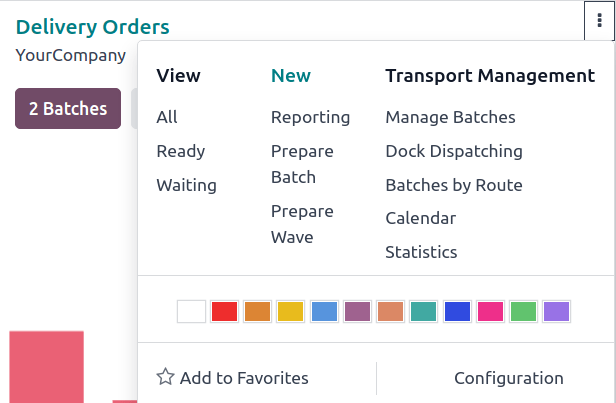
Another place to create batches is by going to the app, and in the Delivery Orders card, click the (vertical ellipsis) icon. In the resulting drop-down menu, click Prepare batch.
注釈
:guilabel:`輸送管理`ドロップダウンメニューには、車両管理用の他のツールも含まれています。
バッチ管理: バッチのリストを開く
ドック配車管理: スケジュールされたバッチオペレーションの週次カレンダを開く
ルート別バッチ: フルフィルメントルートごとにグループ化されたバッチのカンバンビューを開く
カレンダ: スケジュールされた作業の時間単位カレンダを開く
統計: 一括転送のピボットテーブルを開く
バッチフォーム
一括転送フォームに以下の項目を入力して下さい:
Responsible: Assign an employee to the picking. Leave blank if any worker can fulfill this picking.
Operation Type: From the drop-down menu, select the operation type under which the picking is categorized.
Scheduled Date: Specify the date by which the Responsible person should complete the transfer to the output location.
Dock Location: Select the loading location.
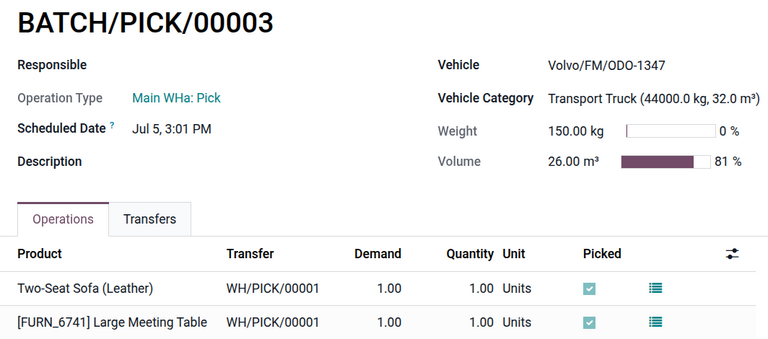
Vehicle: Select the vehicle, which will auto-fill the Vehicle Category.
Vehicle Category: Determine if the order exceeds the vehicle's capacity limits
Example
The Volume bar indicates that the transport truck is nearing capacity.
配送ルートを準備する
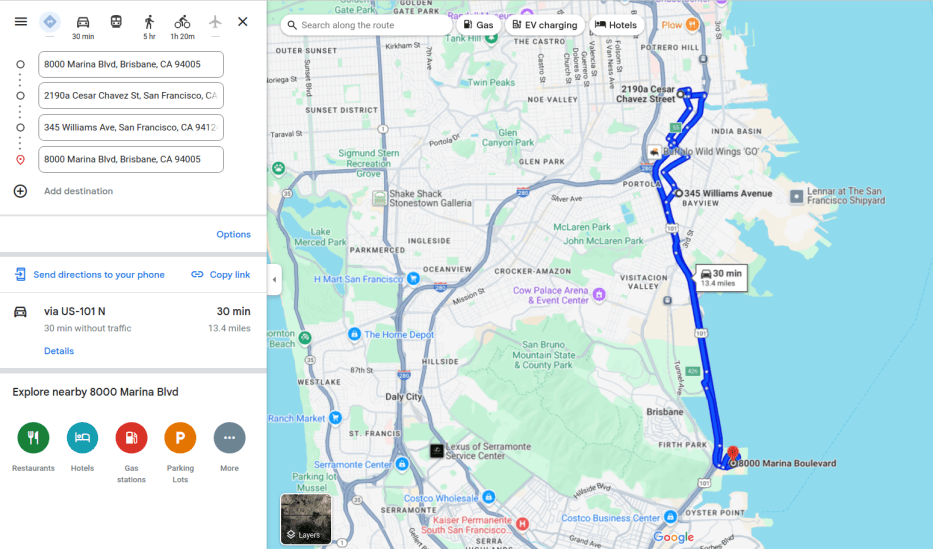
ドライバーが準備できるように、バッチまたはウェーブの上部にある 地図 ボタンをクリックして、配送先を地図上に表示します。個々の出荷オーダを選択すると、その場所が特定されます。
注釈
地図 ボタンは、進行中 ステータスの転送に対してのみ表示されます。
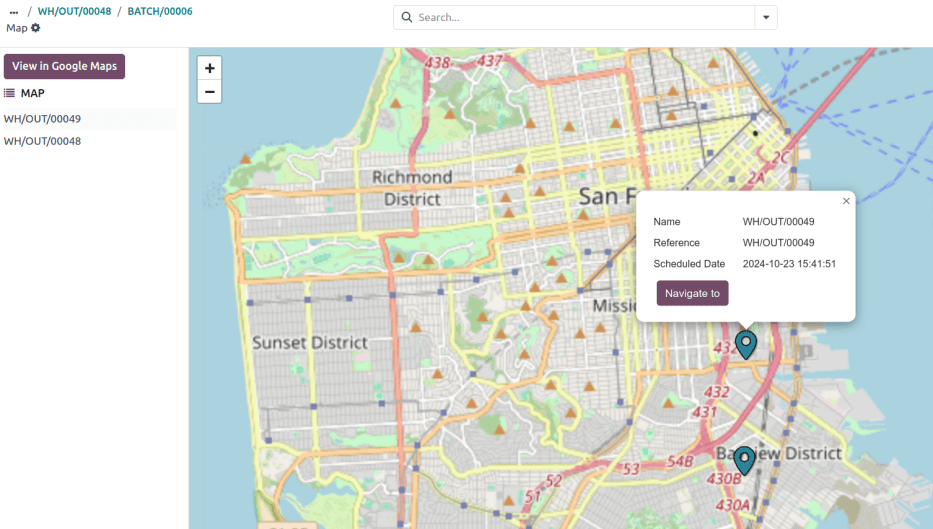
さらに、Googleマップで見る ボタンを使用して、倉庫から配送先までのルートを生成します。